Welcome
to Realtime-Spy's 10 Step Installation Guide. With this
guide you should have Realtime-Spy up and running in minutes!
Click
here to Get Started!
For Realtime-Spy's Install Guide for Mac, Click Here.
|
Jump
to Step: 1 - 2 - 3 - 4 - 5 - 6 - 7 - 8 - 9 - 10
|
Step
1
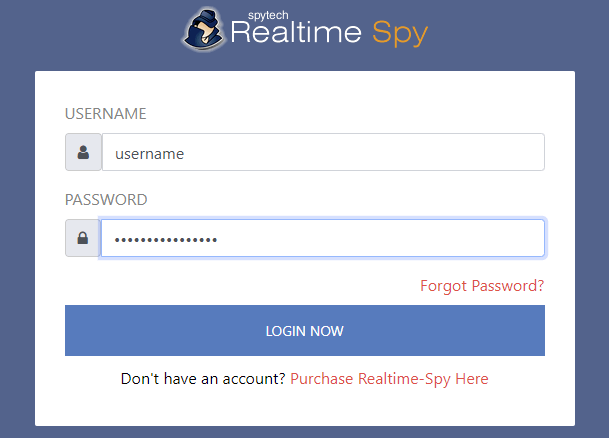
After purchasing your copy of Realtime-Spy, login to your member's area located at
www.realtime-spy.com/members/
Enter
in your username/password at the prompt to continue!
|
Next Step | Back to Top
|
Step
2
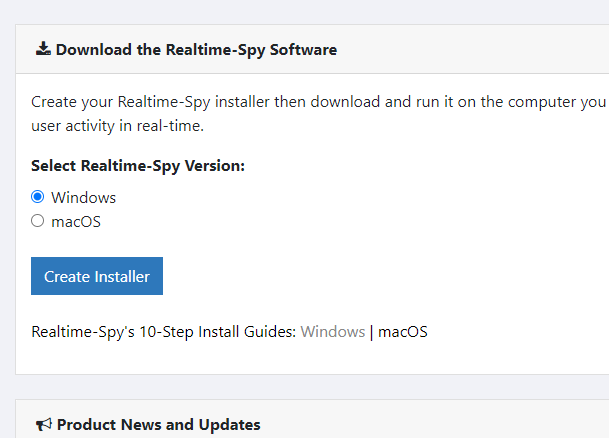
After logging in to your Realtime-Spy account, select Windows for your Realtime-Spy version, then click on "Create Installer".
|
Next Step | Back
to Top
|
Step
3
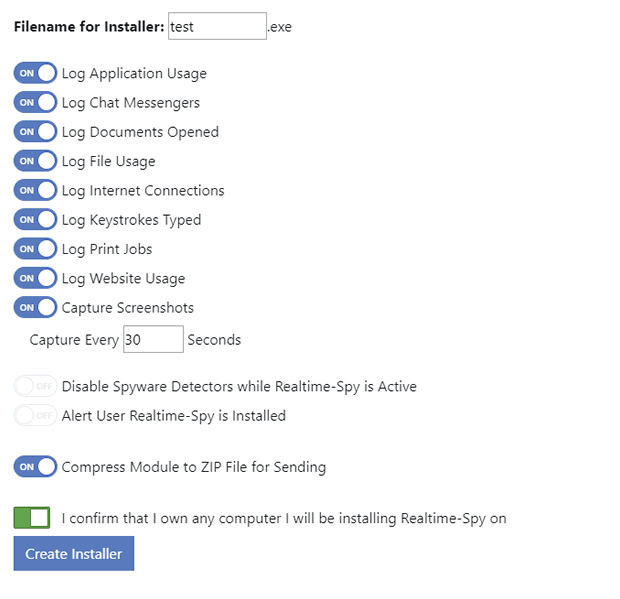
You will now be able to configure the logging options you want for your Realtime-Spy logging module. Configure your monitoring options, as shown below, and specify a name you want to name your logging module file as (ie: vacation_pictures.exe). This is the file that is ran on the computer you want to monitor to install and start the monitoring process. Once
you have your options set click "Create Module" to create your
logging module.
Note: If you are emailing the logging module to your remote computer, please use the 'Compress Module to ZIP File for Sending' option. This will place your module in a ZIP file for emailing the module. If you are downloading the module directly to your computer that you want to monitor, you do not need to use the 'Compress' option.
|
Next Step | Back
to Top
|
Step
4
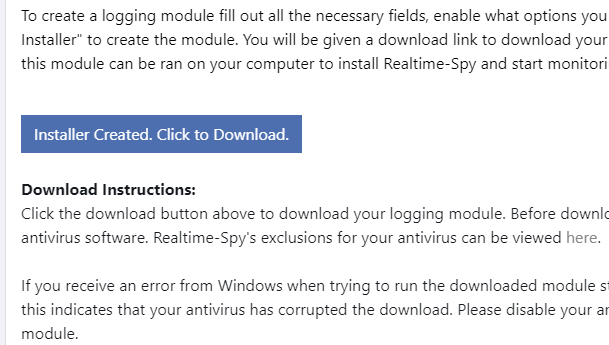
After your module is created you will be given a download link, as shown below. Click the download link to immediately download the logging module file. In this guide we are using Chrome as our web-browser to download. Most browsers (such as Chrome) will save the file to your Downloads folder, or prompt you to choose a location to save it to.
|
Your downloaded module, if you did not use the 'Compress to ZIP File' option. |
Your downloaded module, if you used the 'Compress to ZIP File' option. |
Next Step | Back
to Top
|
Step
5
Now it is time to send out the file
to the remote PC. In this guide we are using Thunderbird for our email client.
Click
the "Write" button to open a new mail window. In other email clients this may be labeled as "Create Message", "Compose", "New Mail", "Create Mail", etc.
Do you have physical access to the computer you want to monitor? If you have physical access to the computer you want to monitor you can simply run the logging module you created above directly on the computer to be monitored, then proceed to Step 8 below. When running the module directly we recommend right clicking on it and using 'Run As Administrator' to run and install it. |
Next Step | Back
to Top
|
Step
6
Click ATTACH and navigate to where you saved
your Realtime-Spy file you created and downloaded previously. Click on
the file and then click 'Attach' to attach the file to
your email.
|
Next Step | Back
to Top
|
Step
7
You will now have to enter a recipient for
the file you are sending, as well as an email subject and
body. Notice the size of the Realtime-Spy file - it should
be approximately 100-120kb at all times!
Once
you are ready to go click Send to send the email!
Note: Your email will have your own email address in the 'From" field, and the 'To' field will contain the actual email address of the user on your computer you want to send the module to. The subject and mail body can be anything.
|

Next Step | Back
to Top
|
Step
8
Once you send out the file or install it on the computer yourself, you can then
login to your Realtime-Spy webspace to view logs. This is located at
www.realtime-spy.com/members/
Enter
in your username/password at the prompt to continue!
|
Next Step | Back
to Top
|
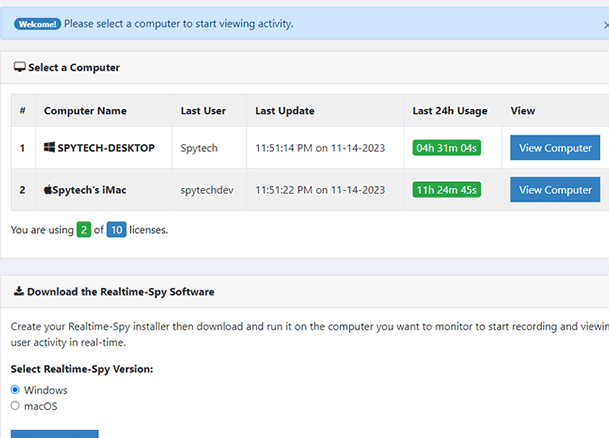
Step
9
You will be presented with your Realtime-Spy
dashboard. Here you can select and view computers that are currently being monitored with the Realtime-Spy software.
Note: Computers
will only appear after the Realtime-Spy installer has been ran on them.
|
Next Step | Back
to Top |
Step
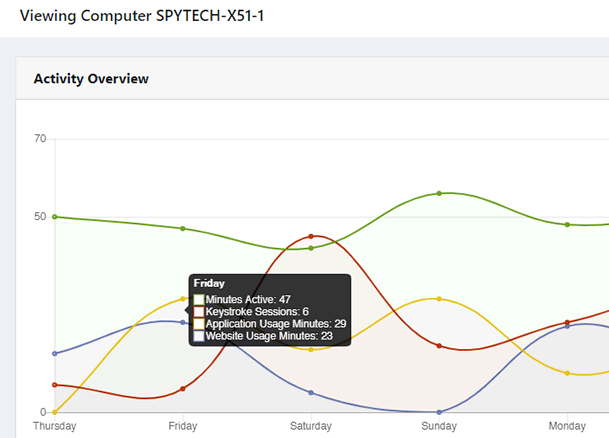
10
After selecting a computer to view logs for, you can click on the various log viewers on the left side of your member's area to view each log or report.
If
you have any questions check out the Realtime-Spy page
at www.realtime-spy.com
|
Back
to Top |
| |
